> ## Documentation Index
> Fetch the complete documentation index at: https://dub-mintlify-update-supabase-lead-tracking-guide-82850.mintlify.site/llms.txt
> Use this file to discover all available pages before exploring further.
# Stripe
> Learn how to track sale conversion events with Stripe and Dub
Conversion tracking requires a [Business plan](https://dub.co/pricing)
subscription or higher.
When it comes to [conversion tracking](/conversions/quickstart), a `sale` event happens when a user purchases your product or service. Examples include:
* Subscribing to a paid plan
* Usage expansion (upgrading from one plan to another)
* Purchasing a product from your online store
 In this guide, we will be focusing on tracking sale events with Stripe as the payment processor by leveraging Dub's Stripe integration.
## Installing the Dub Stripe integration
Dub comes with a powerful Stripe integration that automatically listens to payment events on Stripe and track them as sales on Dub.
Here's how you can install the Dub Stripe integration:
Navigate to the [Dub Stripe Integration](https://d.to/stripe/app) on the Stripe App Marketplace.
In this guide, we will be focusing on tracking sale events with Stripe as the payment processor by leveraging Dub's Stripe integration.
## Installing the Dub Stripe integration
Dub comes with a powerful Stripe integration that automatically listens to payment events on Stripe and track them as sales on Dub.
Here's how you can install the Dub Stripe integration:
Navigate to the [Dub Stripe Integration](https://d.to/stripe/app) on the Stripe App Marketplace.
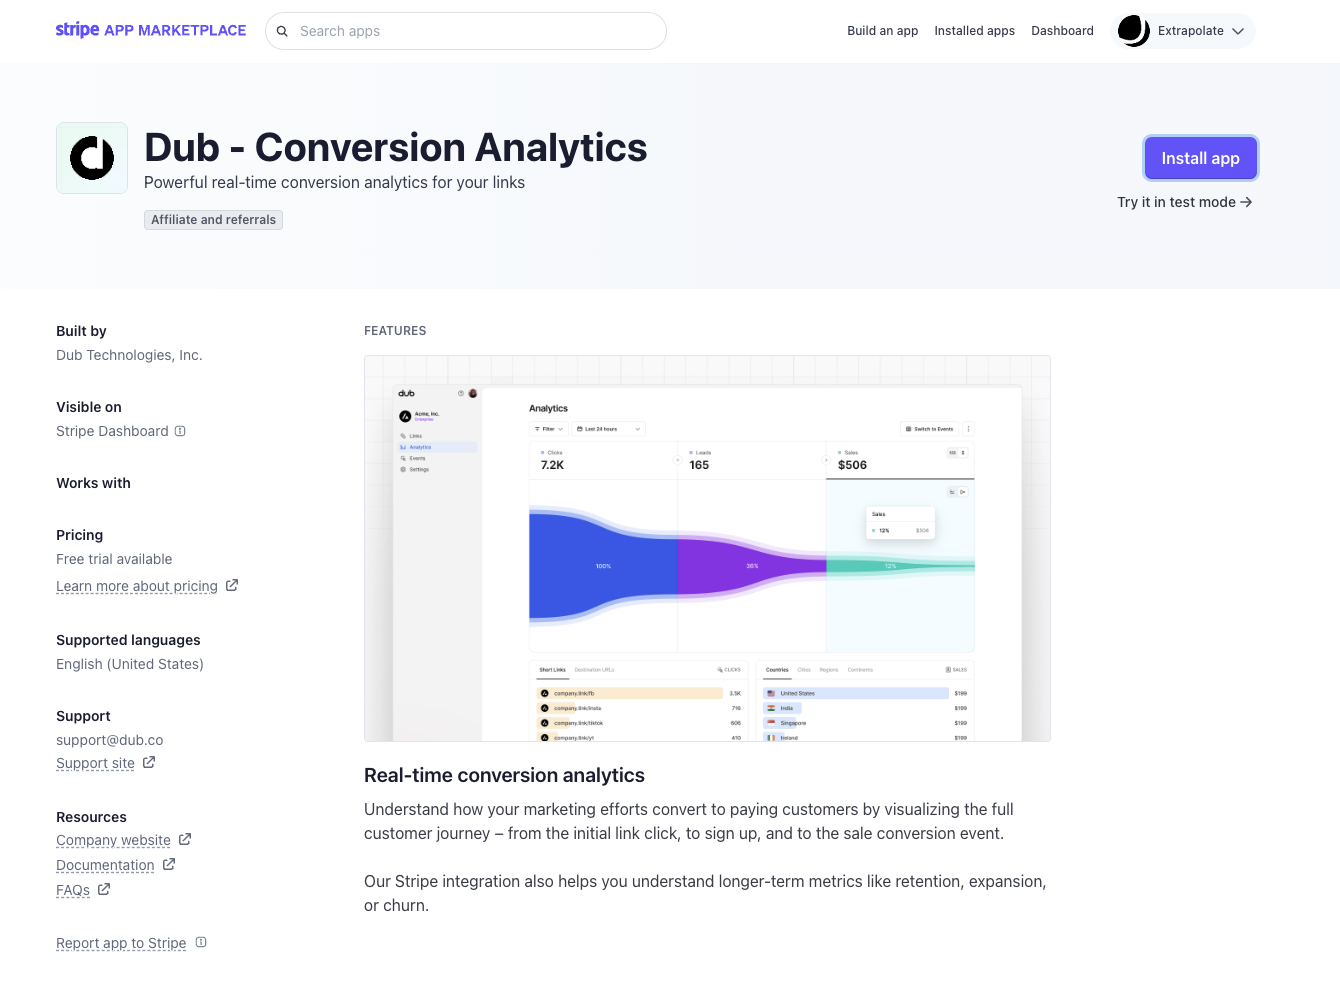 On the top right, click on **Install app** to install the Dub app on your Stripe account.
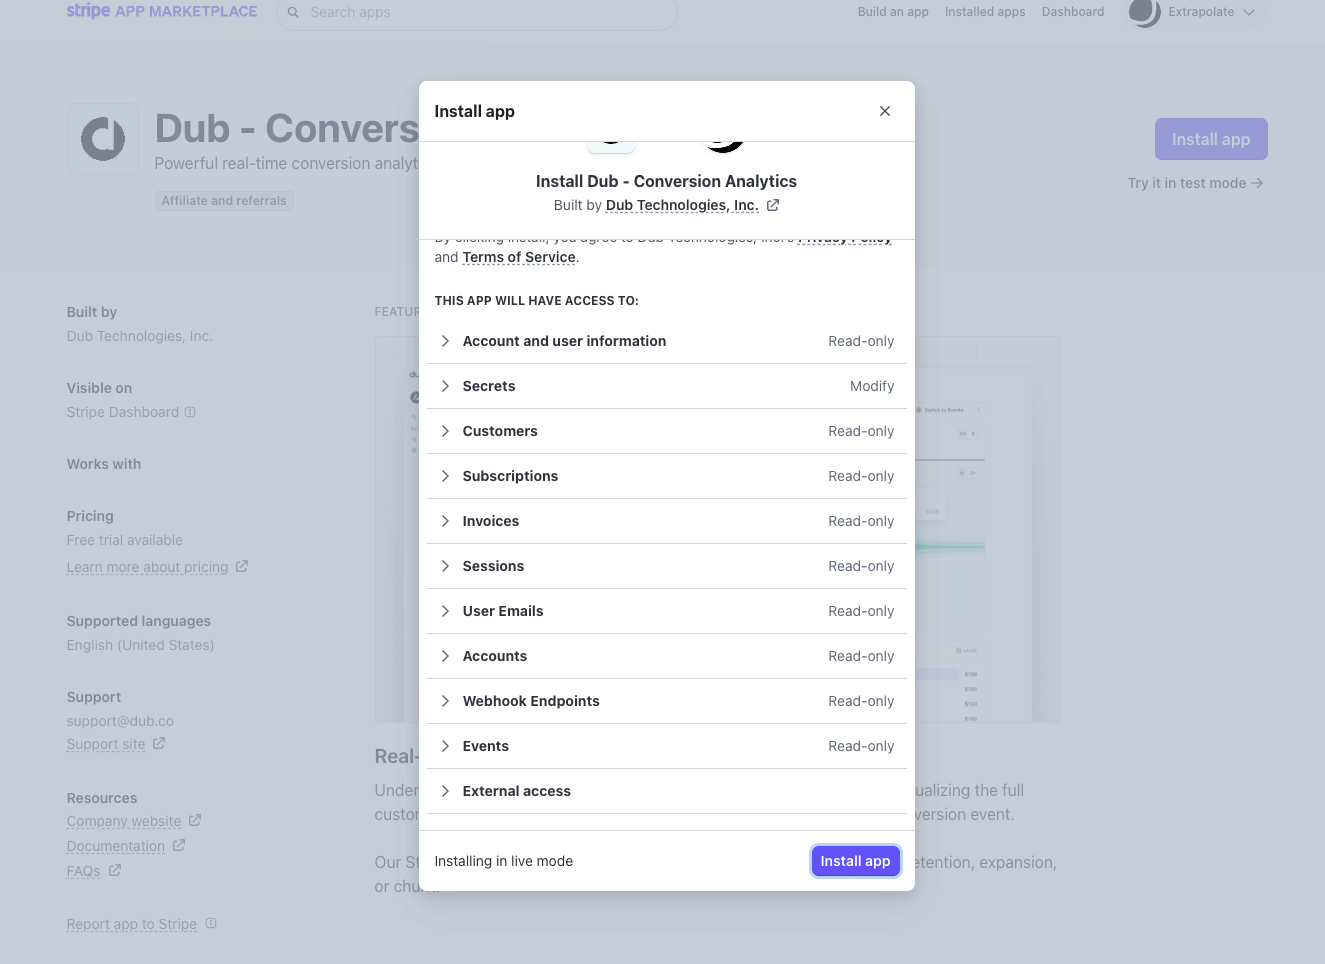 Alternatively, you can also install the Stripe app in test mode first to test
your end-to-end flow without involving real money.
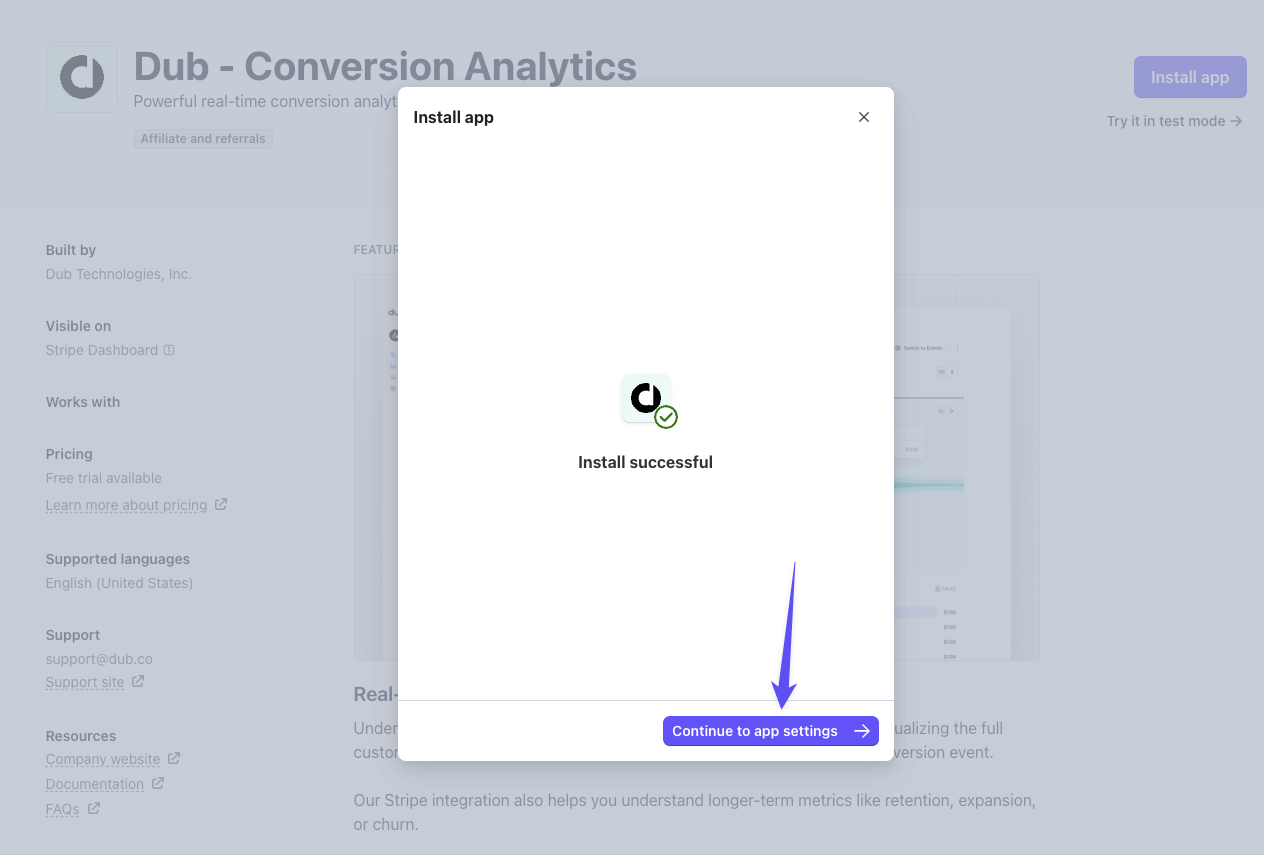
Once the app is installed, click on **Continue to app settings** to finish the installation.
Alternatively, you can also install the Stripe app in test mode first to test
your end-to-end flow without involving real money.
Once the app is installed, click on **Continue to app settings** to finish the installation.
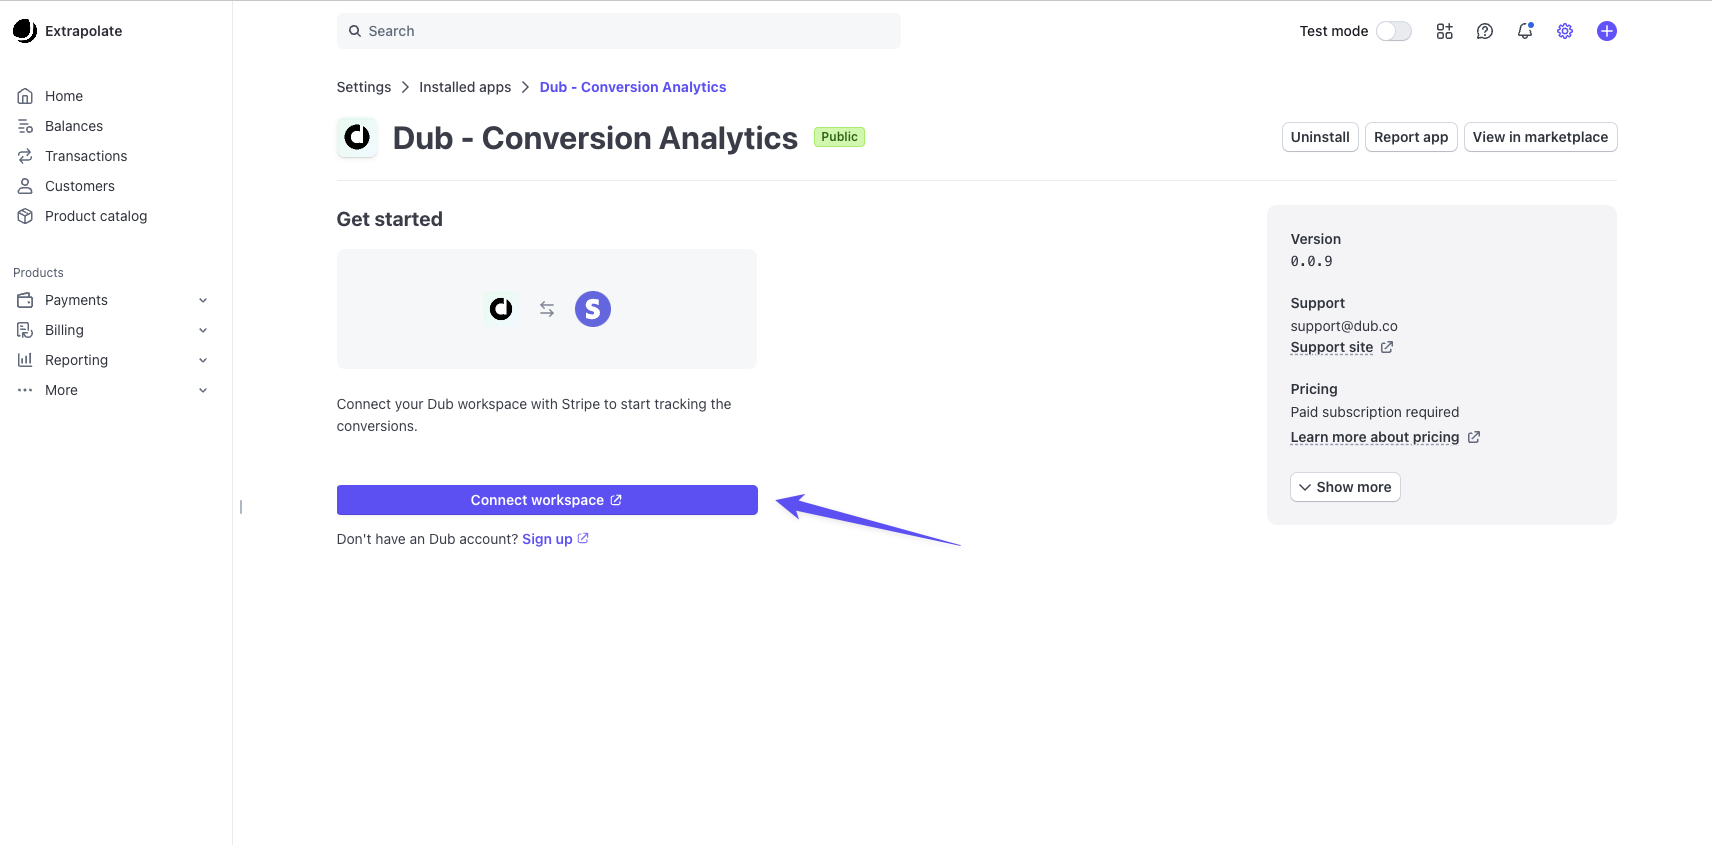
 In the app settings page, click on **Connect workspace** to connect your Stripe account with your Dub workspace.
 This will redirect you to the [Dub OAuth flow](/integrations/quickstart), where you can select the Dub workspace you want to connect to your Stripe account.
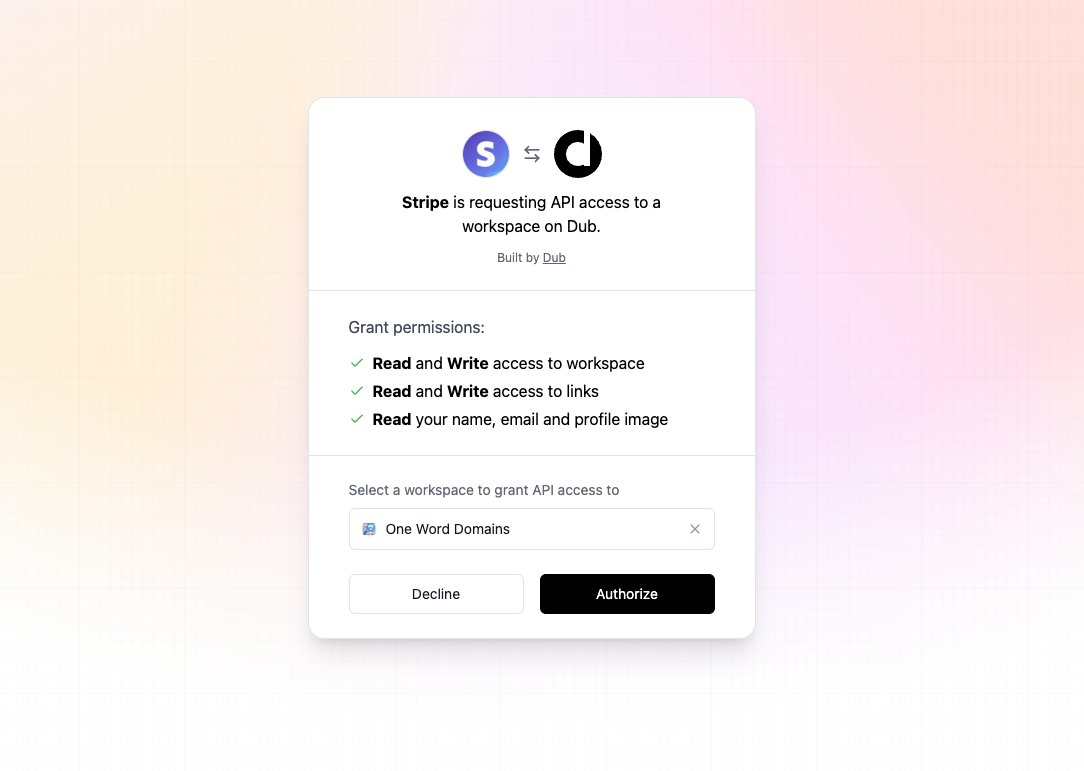 Once you click on **Authorize**, you will be redirected back to the Dub app settings page on Stripe, where you should see that the integration is now installed.
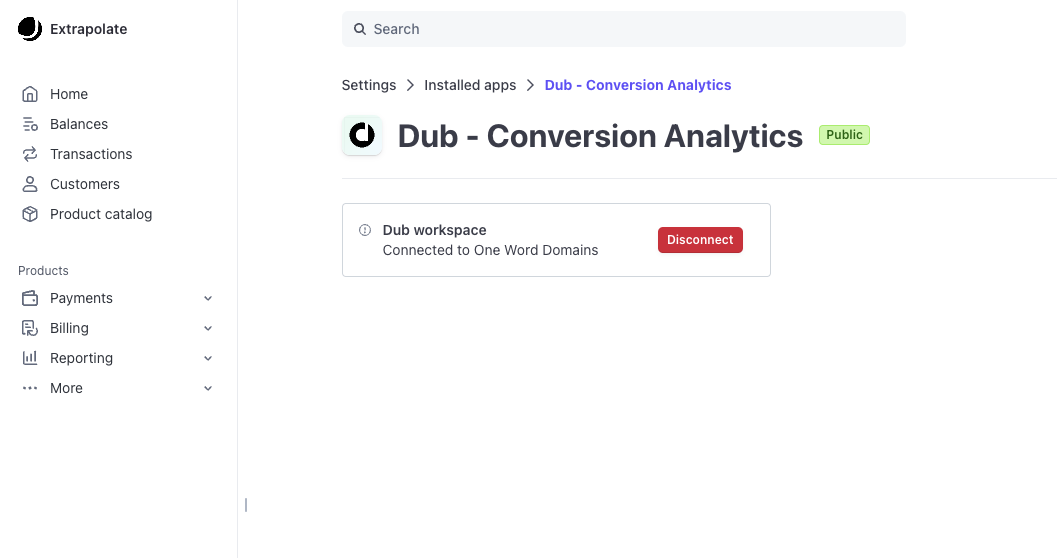 Once the integration is installed, Dub will automatically listen to the following events on Stripe and track them as sales on Dub:
* `customer.created`: When a new customer is created
* `customer.updated`: When a customer is updated
* `checkout.session.completed`: When a customer completes a checkout session
* `invoice.paid`: When an invoice is paid (for tracking recurring subscriptions)
* `charge.refunded`: When a charge is refunded (for tracking refunds and updating payout commissions for [Dub Partners](https://dub.partners))
## Tracking sales with the Dub Stripe integration
Depending on your setup, there are a few ways you can track sales with the Dub Stripe integration.
* [Option 1: Using Stripe Payment Links](#option-1%3A-using-stripe-payment-links)
* [Option 2: Using Stripe Checkout (recommended)](#option-2%3A-using-stripe-checkout-recommended)
* [Option 3: Using Stripe Customers](#option-3%3A-using-stripe-customers)
### Option 1: Using Stripe Payment Links
For this option to work, you need to [install the Dub Stripe
integration](#installing-the-dub-stripe-integration) and [enable conversion
tracking for your
links](/conversions/quickstart#step-1%3A-enable-conversion-tracking-for-your-links)
first.
If you're using [Stripe Payment Links](https://docs.stripe.com/payment-links), simply add a `?dub_client_reference_id=1` query parameter to your Stripe Payment Link when shortening it on Dub.
Then, when a user clicks on the shortened link, Dub will automatically append the unique click ID as the `client_reference_id` [query parameter](https://docs.stripe.com/payment-links/url-parameters) to the payment link.
Once the integration is installed, Dub will automatically listen to the following events on Stripe and track them as sales on Dub:
* `customer.created`: When a new customer is created
* `customer.updated`: When a customer is updated
* `checkout.session.completed`: When a customer completes a checkout session
* `invoice.paid`: When an invoice is paid (for tracking recurring subscriptions)
* `charge.refunded`: When a charge is refunded (for tracking refunds and updating payout commissions for [Dub Partners](https://dub.partners))
## Tracking sales with the Dub Stripe integration
Depending on your setup, there are a few ways you can track sales with the Dub Stripe integration.
* [Option 1: Using Stripe Payment Links](#option-1%3A-using-stripe-payment-links)
* [Option 2: Using Stripe Checkout (recommended)](#option-2%3A-using-stripe-checkout-recommended)
* [Option 3: Using Stripe Customers](#option-3%3A-using-stripe-customers)
### Option 1: Using Stripe Payment Links
For this option to work, you need to [install the Dub Stripe
integration](#installing-the-dub-stripe-integration) and [enable conversion
tracking for your
links](/conversions/quickstart#step-1%3A-enable-conversion-tracking-for-your-links)
first.
If you're using [Stripe Payment Links](https://docs.stripe.com/payment-links), simply add a `?dub_client_reference_id=1` query parameter to your Stripe Payment Link when shortening it on Dub.
Then, when a user clicks on the shortened link, Dub will automatically append the unique click ID as the `client_reference_id` [query parameter](https://docs.stripe.com/payment-links/url-parameters) to the payment link.
 Finally, when the user completes the checkout flow, Dub will automatically [track the sale event](/api-reference/endpoint/track-sale) and [update the customer's `customerExternalId`](/api-reference/endpoint/update-a-customer) with their Stripe customer ID for future reference.
Alternatively, if you have a marketing site that you're redirecting your users to first, you can do this instead:
1. [Install the @dub/analytics client-side SDK](/sdks/client-side/introduction), which automatically detects the `dub_id` in the URL and stores it as a first-party cookie on your site.
2. Then, retrieve and append the `dub_id` value as the `client_reference_id` parameter to the payment links on your pricing page / CTA button (prefixed with `dub_id_`).
```
https://buy.stripe.com/xxxxxx?client_reference_id=dub_id_xxxxxxxxxxxxxx
```
If you're using [Stripe Pricing Tables](https://docs.stripe.com/payments/checkout/pricing-table) – you'd want to pass the Dub click ID as a [`client-reference-id` attribute](https://docs.stripe.com/payments/checkout/pricing-table#handle-fulfillment-with-the-stripe-api) instead:
```html HTML
Finally, when the user completes the checkout flow, Dub will automatically [track the sale event](/api-reference/endpoint/track-sale) and [update the customer's `customerExternalId`](/api-reference/endpoint/update-a-customer) with their Stripe customer ID for future reference.
Alternatively, if you have a marketing site that you're redirecting your users to first, you can do this instead:
1. [Install the @dub/analytics client-side SDK](/sdks/client-side/introduction), which automatically detects the `dub_id` in the URL and stores it as a first-party cookie on your site.
2. Then, retrieve and append the `dub_id` value as the `client_reference_id` parameter to the payment links on your pricing page / CTA button (prefixed with `dub_id_`).
```
https://buy.stripe.com/xxxxxx?client_reference_id=dub_id_xxxxxxxxxxxxxx
```
If you're using [Stripe Pricing Tables](https://docs.stripe.com/payments/checkout/pricing-table) – you'd want to pass the Dub click ID as a [`client-reference-id` attribute](https://docs.stripe.com/payments/checkout/pricing-table#handle-fulfillment-with-the-stripe-api) instead:
```html HTML
We offer plans that help any business!
```
```jsx React
import * as React from "react";
function PricingPage() {
// Paste the stripe-pricing-table snippet in your React component
return (
);
}
export default PricingPage;
```
If you're using Stripe's [Checkout Sessions API](https://docs.stripe.com/api/checkout/sessions/object) for a recurring subscription service, you might want to check out our [Stripe Checkout option](#option-2%3A-using-stripe-checkout-recommended) instead.
If your setup doesn't involve a [lead event](/conversions/leads/introduction) and goes straight to the Stripe checkout flow (e.g. for one-time purchases), you can simply pass the Dub click ID (prefixed with `dub_id_`) as the [`client_reference_id` parameter](https://docs.stripe.com/api/checkout/sessions/object#checkout_session_object-client_reference_id) to enable conversion tracking with Dub.
```javascript Node.js
const session = await stripe.checkout.sessions.create({
success_url: "https://example.com/success",
line_items: [
{
price: "price_xxxxxxxxxxxxxxxx",
quantity: 2,
},
],
mode: "payment",
client_reference_id: "dub_id_xxxxxxxxxxxxxx",
});
```
```python Python
stripe.checkout.Session.create(
success_url="https://example.com/success",
line_items=[{"price": "price_xxxxxxxxxxxxxxxx", "quantity": 2}],
mode="payment",
client_reference_id="dub_id_xxxxxxxxxxxxxx",
)
```
```go Go
params := &stripe.CheckoutSessionParams{
SuccessURL: stripe.String("https://example.com/success"),
LineItems: []*stripe.CheckoutSessionLineItemParams{
&stripe.CheckoutSessionLineItemParams{
Price: stripe.String("price_xxxxxxxxxxxxxxxx"),
Quantity: stripe.Int64(2),
},
},
Mode: stripe.String(string(stripe.CheckoutSessionModePayment)),
ClientReferenceID: stripe.String("dub_id_xxxxxxxxxxxxxx"),
};
result, err := session.New(params);
```
```php PHP
$stripe->checkout->sessions->create([
'success_url' => 'https://example.com/success',
'line_items' => [
[
'price' => 'price_xxxxxxxxxxxxxxxx',
'quantity' => 2,
],
],
'mode' => 'payment',
'client_reference_id' => "dub_id_xxxxxxxxxxxxxx",
]);
```
```ruby Ruby
Stripe::Checkout::Session.create({
success_url: 'https://example.com/success',
line_items: [
{
price: 'price_xxxxxxxxxxxxxxxx',
quantity: 2,
},
],
mode: 'payment',
client_reference_id: "dub_id_xxxxxxxxxxxxxx",
})
```
### Option 2: Using Stripe Checkout (recommended)
If you have a custom checkout flow that uses Stripe's `checkout.sessions.create` API, you'd want to associate the [Stripe customer object](https://docs.stripe.com/api/customers/object) with the user's unique ID in your database (which we tracked in the [lead conversion tracking step](/conversions/leads/introduction)).
This will allow Dub to automatically listen for purchase events from Stripe and associate them with the original click event (and by extension, the link that the user came from).
Remember in the [lead conversion tracking guide](/conversions/leads/introduction), we passed the user's unique user ID along with the click event ID in the `dub.track.lead` call?
```javascript Node.js
await dub.track.lead({
clickId,
eventName: "Sign Up",
customerExternalId: user.id, // the unique user ID of the customer in your database
customerName: user.name,
customerEmail: user.email,
customerAvatar: user.image,
});
```
Under the hood, Dub records the user as a customer and associates them with the click event that they came from.
Then, when the user makes a purchase, Dub will automatically associate the checkout session details (invoice amount, currency, etc.) with the customer – and by extension, the original click event.
First, you'll need to complete the following prerequisites:
1. [Install the Dub Stripe integration](#installing-the-dub-stripe-integration)
2. [Enable conversion tracking for your links](/conversions/quickstart#step-1%3A-enable-conversion-tracking-for-your-links)
3. [Install the @dub/analytics client-side SDK](/sdks/client-side/introduction)
4. [Install the Dub server-side SDK](/sdks/overview#server-side-sdks)
Then, when you [create a checkout session](https://docs.stripe.com/api/checkout/sessions/create), pass your customer's unique user ID in your database as the `dubCustomerId` value in the `metadata` field.
```javascript Node.js
import { stripe } from "@/lib/stripe";
const user = {
id: "user_123",
email: "user@example.com",
teamId: "team_xxxxxxxxx",
};
const priceId = "price_xxxxxxxxx";
const stripeSession = await stripe.checkout.sessions.create({
customer_email: user.email,
success_url: "https://app.domain.com/success",
line_items: [{ price: priceId, quantity: 1 }],
mode: "subscription",
client_reference_id: user.teamId,
metadata: {
dubCustomerId: user.id, // the unique user ID of the customer in your database
},
});
```
This way, when the customer completes their checkout session, Dub will automatically associate the checkout session details (invoice amount, currency, etc.) with the customer – and by extension, the original click event.
### Option 3: Using Stripe Customers
Alternatively, if you don't use Stripe's [checkout session creation flow](#option-2%3A-using-stripe-checkout-recommended), you can also pass the user ID and the click event ID (`dub_id`) in the [Stripe customer creation flow](https://docs.stripe.com/api/customers/create).
First, you'll need to complete the following prerequisites:
1. [Install the Dub Stripe integration](#installing-the-dub-stripe-integration)
2. [Enable conversion tracking for your links](/conversions/quickstart#step-1%3A-enable-conversion-tracking-for-your-links)
3. [Install the @dub/analytics client-side SDK](/sdks/client-side/introduction)
Then, when you [create a Stripe customer](https://docs.stripe.com/api/customers/create), pass the user's unique user ID in your database as the `dubCustomerId` value in the `metadata` field.
```javascript Node.js
import { stripe } from "@/lib/stripe";
const user = {
id: "user_123",
email: "user@example.com",
teamId: "team_xxxxxxxxx",
};
const dub_id = req.headers.get("dub_id");
await stripe.customers.create({
email: user.email,
name: user.name,
metadata: {
dubCustomerId: user.id,
dubClickId: dub_id,
},
});
```
Alternatively, you can also pass the `dubCustomerId` and `dubClickId` values in the `metadata` field of the [Stripe customer update flow](https://docs.stripe.com/api/customers/update):
```javascript Node.js
import { stripe } from "@/lib/stripe";
const user = {
id: "user_123",
email: "user@example.com",
teamId: "team_xxxxxxxxx",
};
const dub_id = req.headers.get("dub_id");
await stripe.customers.update(user.id, {
metadata: {
dubCustomerId: user.id,
dubClickId: dub_id,
},
});
```
This way, when the customer makes a purchase, Dub will automatically associate the purchase details (invoice amount, currency, etc.) with the original click event.
## Currency conversion support
If you're using [Stripe's Adaptive Pricing](https://docs.stripe.com/payments/checkout/adaptive-pricing) feature, Dub will record the sale amount using the currency of your Stripe account:
```json checkout.session.completed
// Stripe checkout.session.completed event payload
{
"id": "{{EVENT_ID}}",
"object": "event",
"type": "checkout.session.completed",
"data": {
"object": {
"id": "{{SESSION_ID}}",
"object": "checkout.session",
"currency": "cad",
"amount_subtotal": 2055,
"amount_total": 2055,
"currency_conversion": {
"amount_subtotal": 1500,
"amount_total": 1500, // this is the amount that Dub will record
"source_currency": "usd", // the currency of your Stripe account
"fx_rate": "1.37"
}
}
}
}
```
If you're not using Stripe Adaptive Pricing, Dub will record the sale amount in the default currency of your Dub workspace. This means that if you pass a different currency, it will be automatically converted to USD for reporting consistency – using the latest foreign exchange rates.
```json checkout.session.completed
// Stripe checkout.session.completed event payload
{
"id": "{{EVENT_ID}}",
"object": "event",
"type": "checkout.session.completed",
"data": {
"object": {
"id": "{{SESSION_ID}}",
"object": "checkout.session",
"currency": "cad",
"amount_subtotal": 2055,
"amount_total": 2055 // this will be converted from CAD to USD
}
}
}
```
The default currency for all Dub workspaces is currently set to `USD`. We will
add the ability to customize that in the future.
## View conversion results
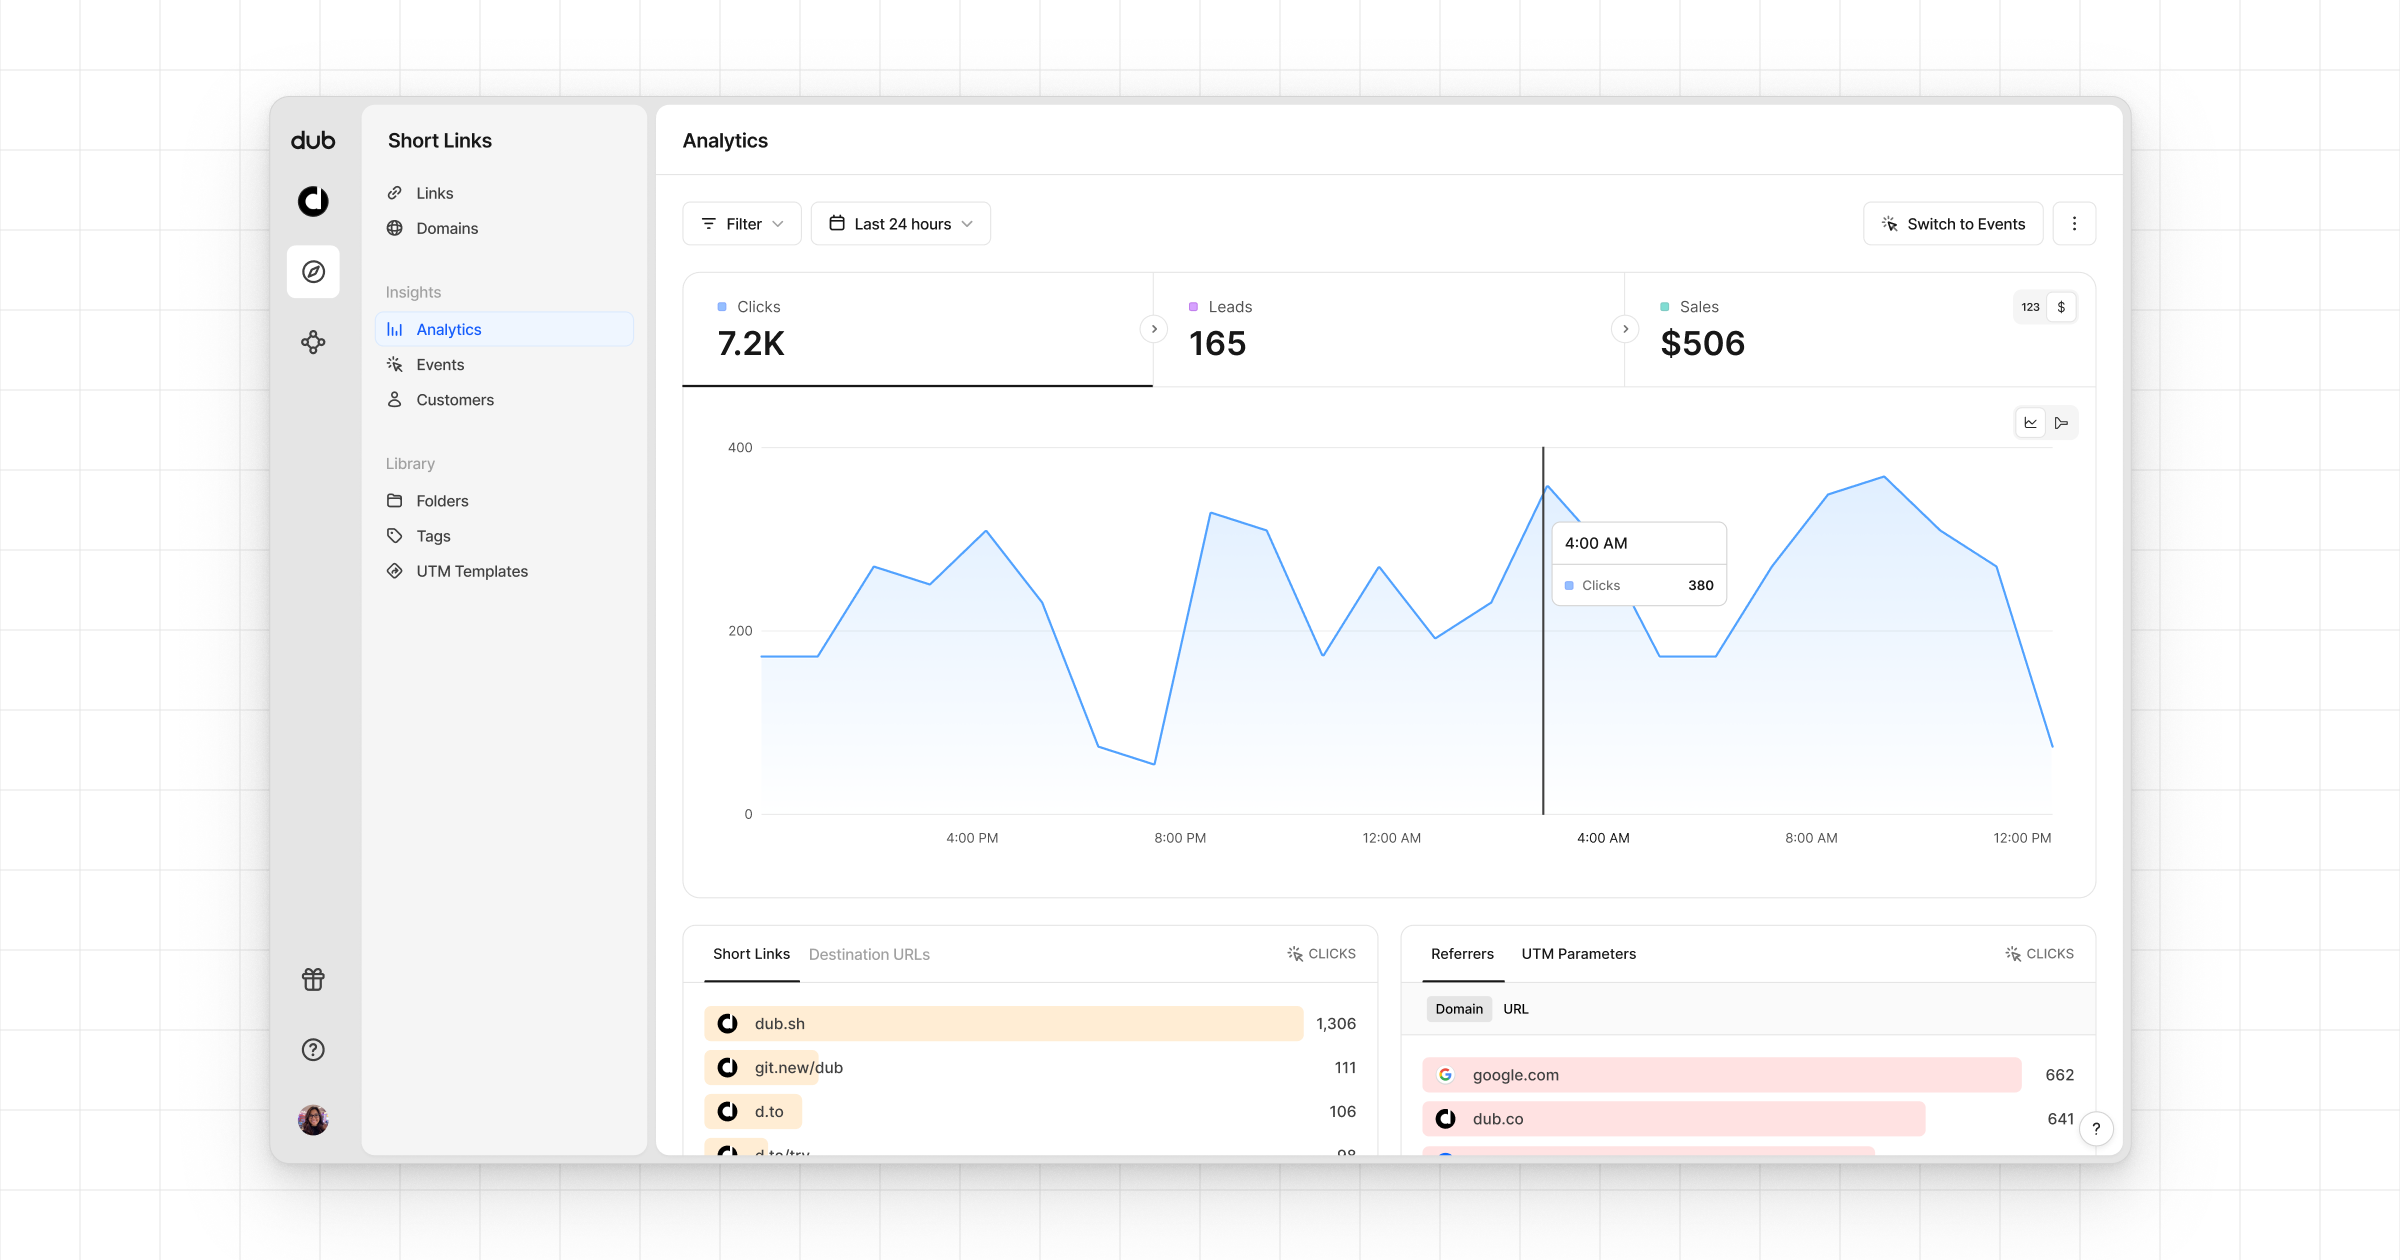
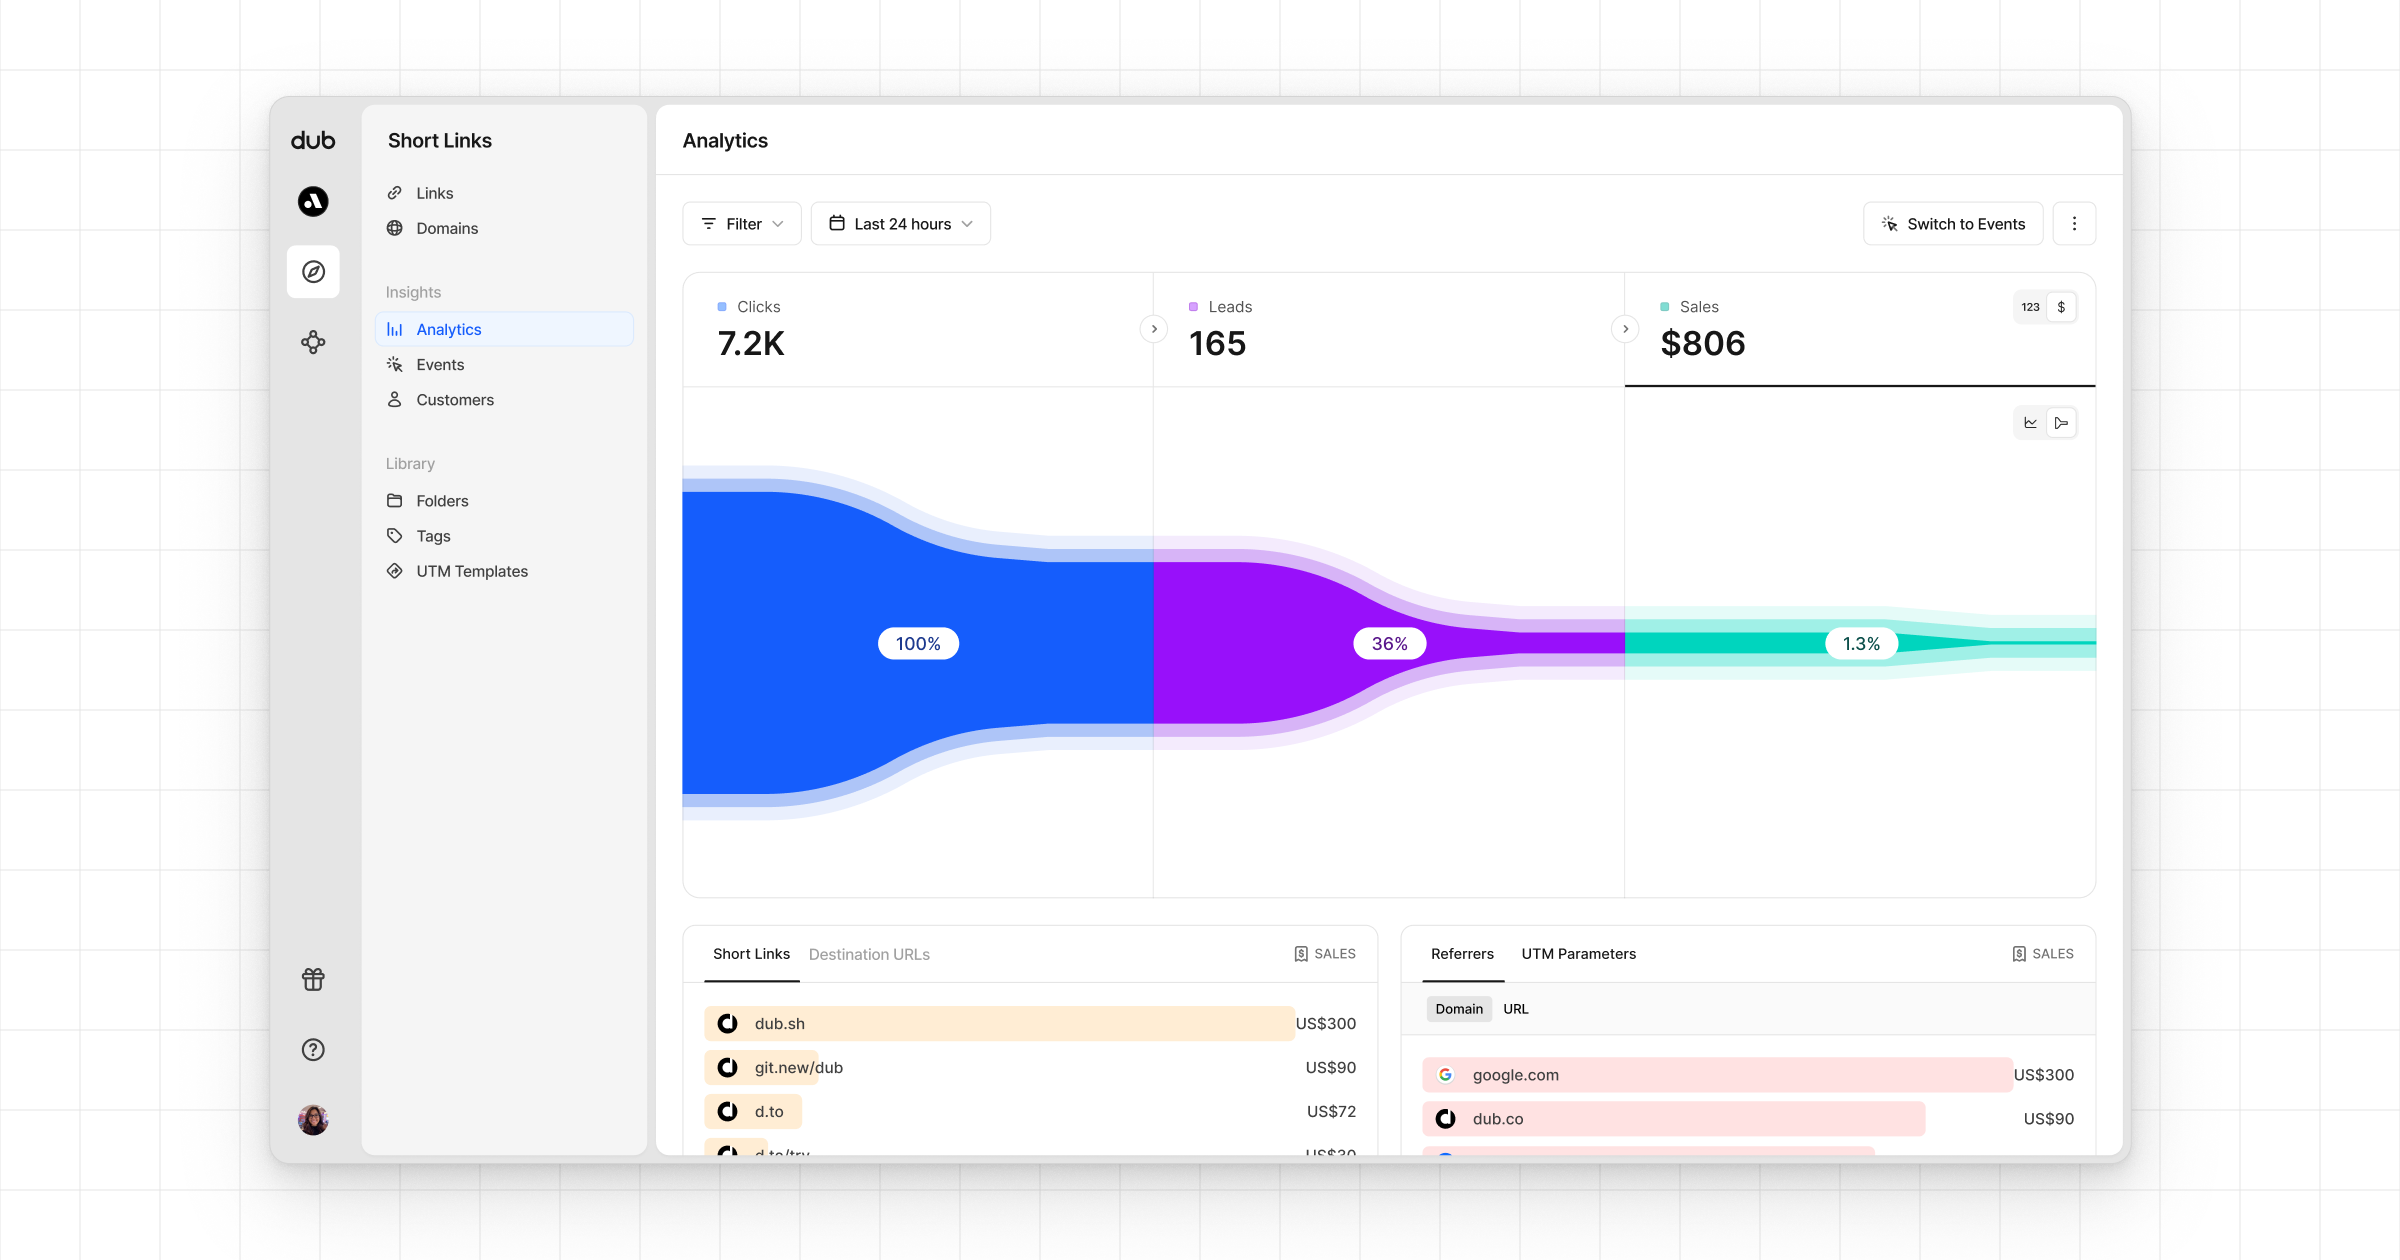
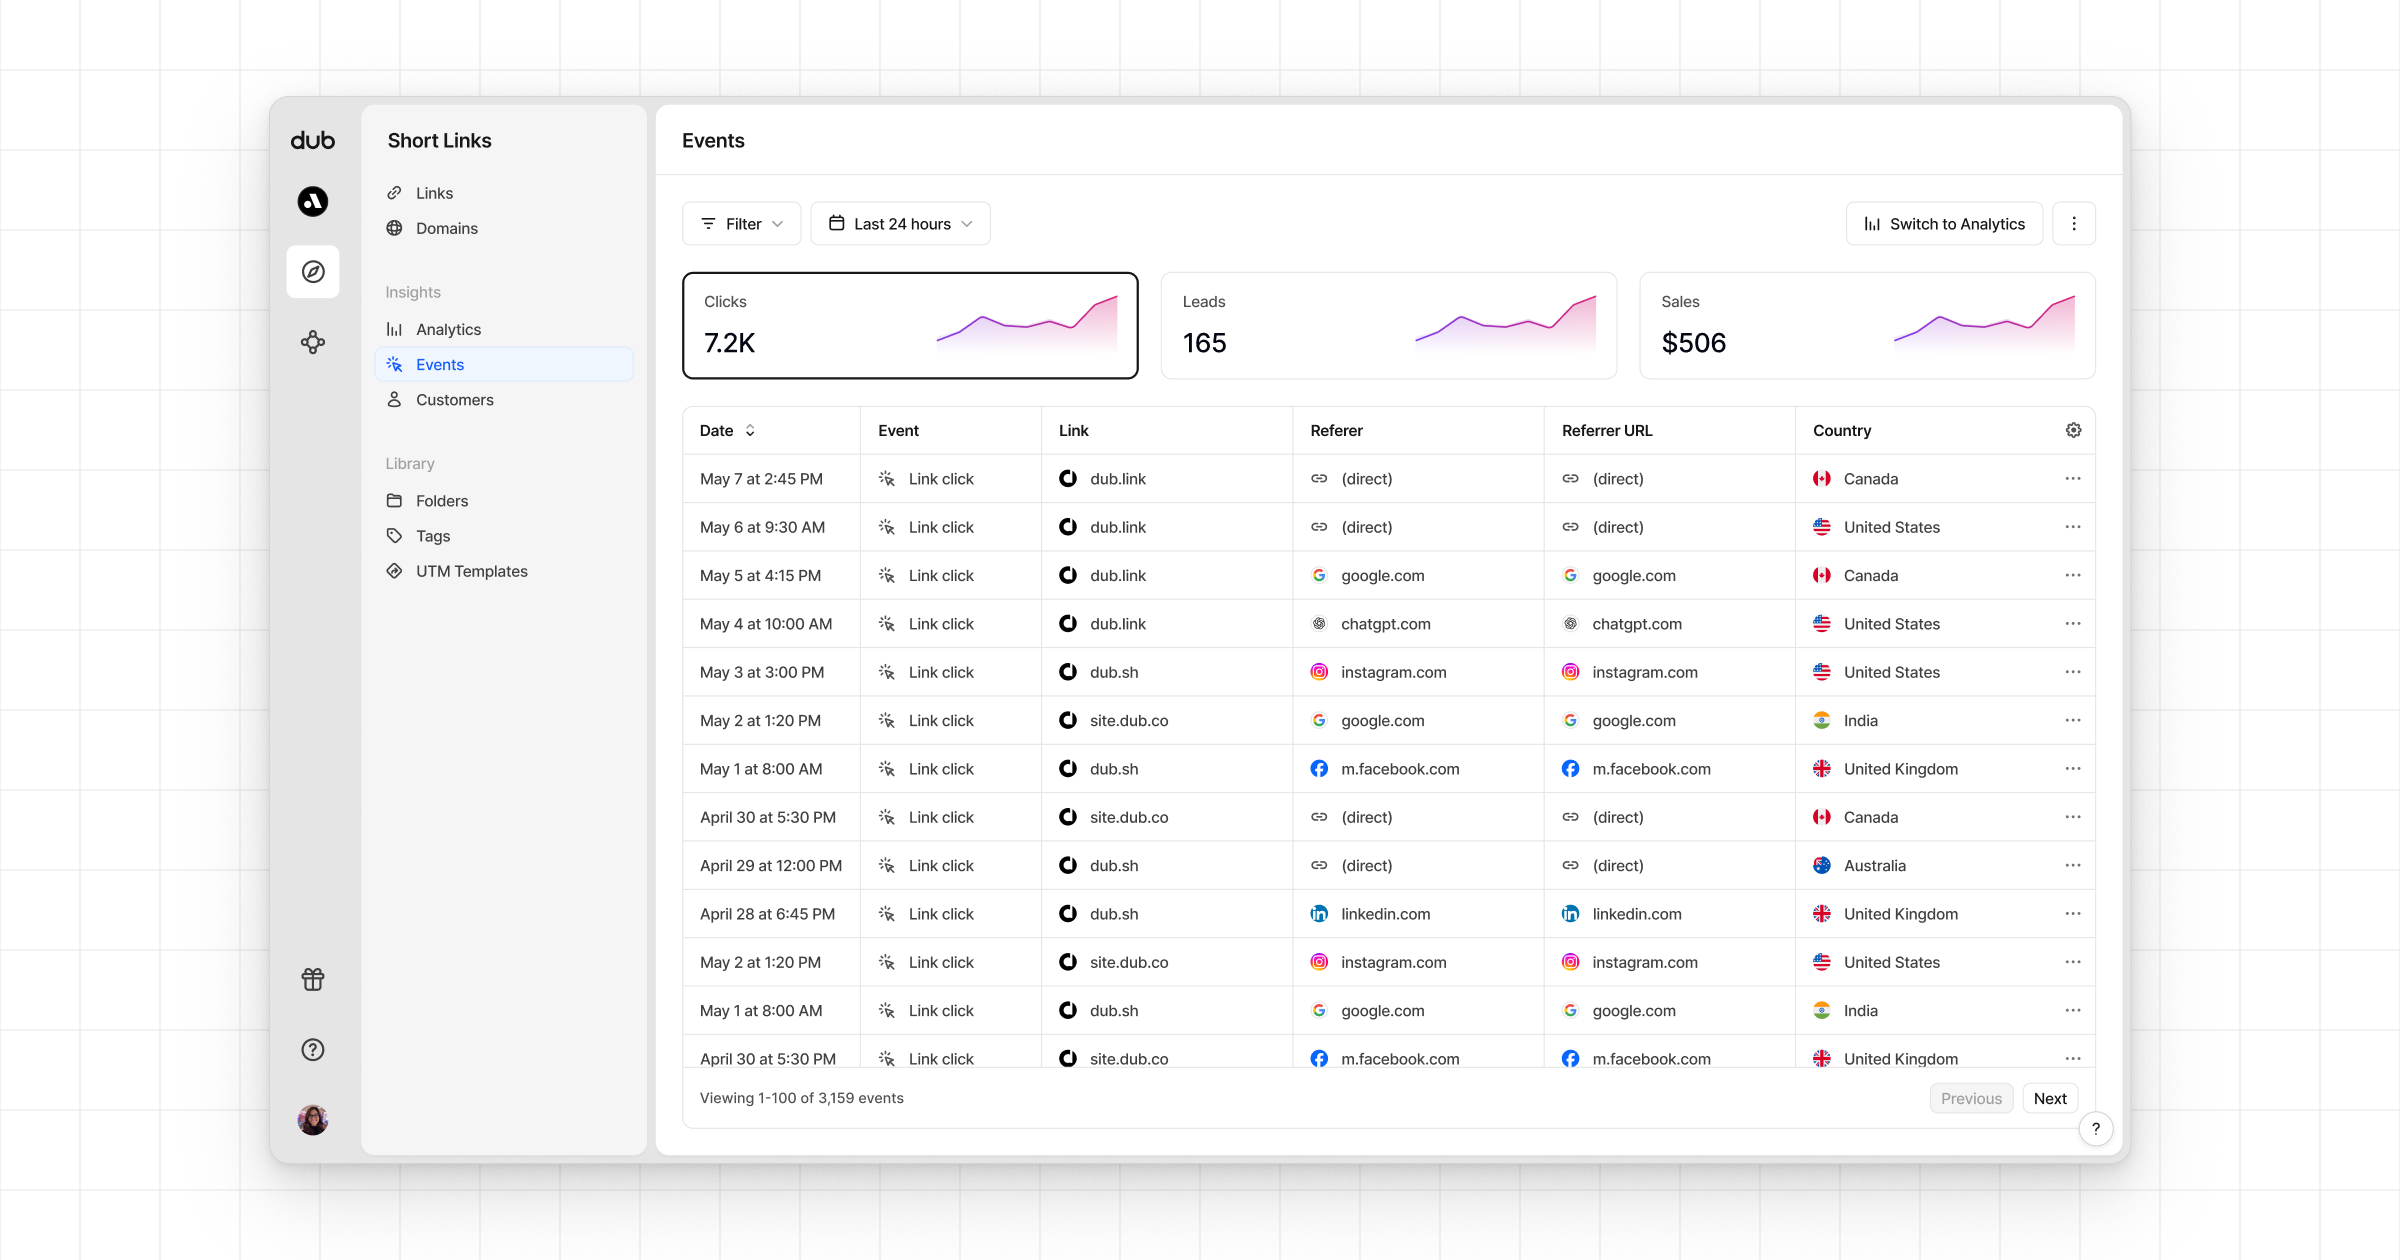
And that's it – you're all set! You can now sit back, relax, and watch your conversion revenue grow. We provide 3 different views to help you understand your conversions:
* **Time-series**: A [time-series view](https://app.dub.co/dub/analytics?view=timeseries) of the number clicks, leads and sales.
 * **Funnel chart**: A [funnel chart view](http://app.dub.co/analytics?view=funnel) visualizing the conversion & dropoff rates across the different steps in the conversion funnel (clicks → leads → sales).
 * **Real-time events stream**: A [real-time events stream](https://app.dub.co/events) of every single conversion event that occurs across all your links in your workspace.
 ## Example Apps
See the full example on GitHub.
## Example Apps
See the full example on GitHub.